Homemade Battery Phone Charger
https://www.youtube.com/watch?v=b52Dn81dFmM
Here is the link to my video!
How It Works:
When the phone charger is connected to the terminal of the battery, it completes the circuit, Therefore the battery produces electricity through a series of electromagnetic reactions between the anode, cathode, and the electrolyte. This is how the battery works. The battery will continue to produce electricity until both electrodes run out of the substance necessary for the reactions to happen.
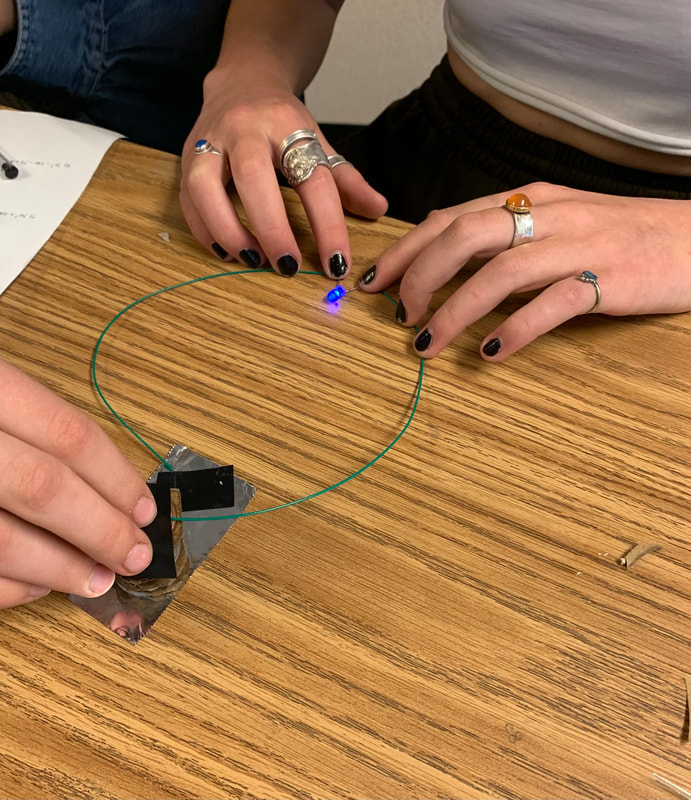
Lemon Battery Experiment
|

|
REFLECTION:
In class this week we build batteries using everyday materials. A lemon battery is a simple battery often made for conducting science experiments. Typically, a piece of zinc metal and a copper penny are injected into a lemon and connected with wire cables. Power generated by reaction of the metals is used to power a small device, charge a phone, or light up a bulb.
A lemon battery works because of an electro-chemical reaction. The citric acid in the lemon works as the electrolyte, the ion gel that can be found in batteries. The nail then goes through the process of oxidation and sheds its electrons. And now because the nail had a negative charge the electrons will flow through the wire, through the circuit and back into the lemon through the penny. After that process the copper penny will then have a positive charge. Now you can connect your voltmeter to your penny and it should have a charge of .5 volts or more!
Rube Goldberg Project
In this project, we learned all about energy and mechanics. We were taught what the 6 simple machines are, inclined plane, wedge, lever, wheel and axle, screw, and pully, and how conservation and energy transfer work. We were then tasked with building a Rube Goldberg machine that included those 6 steps. This machine also had to be related to our Humanities satire. Down below you can see my final product!
Reflection
The definition for the conservation of energy is stating that energy can not be created or destroyed but can be changed from one form to another. Kinetic and potential energy both play a big role in this. Potential energy is basically an object at rest and kinetic energy is an object that is moving. In my Rube Goldberg machine, there were many energy transfers. For example, when the wedge is lifted off the tennis ball and it starts moving the energy is transferred from potential to kinetic.
Energy transfer is almost the same thing as the conservation of energy. But it is the process of energy being moved from one object to another. This is also demonstrated in my RGM. When the tennis ball hits the car and it rolls down the inclined plane that is energy transfer because the energy from the ball is being transferred to the car. This also was another example of potential energy transferred to kinetic.
The 6 simple machines are inclined plane, wedge, lever, wheel and axle, screw, and pully. All of these machines are important because they help make life easier. They are known for helping transfer energy to work. These machines power many everyday items, like cars, planes, and more.
Each of the 6 simple machines are represented in my RGM and I will show you how! I used an inclined plane every time a ball moved down a ramp, my wedge was when the string pulled out the wooden block releasing the tennis ball, I used a lever for the step in my RGM with a ruler, wheel and axle was the toy car, I used a screw at the very beginning of my rube and also the mousetrap at the end, and finally the pulley was used when the string pulled out the wedge.
In our rube RGM, we also had to include a challenge step. We could choose from the 360-degree loop, 720-degree spiral, and the time warp box. I decided to choose the time warp box because it seemed the most challenging and interesting. This meant that in my rube at some point a marble needed to enter a box and come out 10 seconds later. This was really challenging because it was difficult to get the marble to stay in the box for long enough. But in the end, I was successful!
My number one takeaway from this project was learning how vast and complicated Physics is! I would have never thought that Humanities and Physics could be connected but in this project, we proved that wrong. I also learned so much about how energy works and I now understand more clearly how basic everyday devices like lights function.
The biggest challenge in the project was actually getting my RGM to work. I had a really big vision for my rube and even though it did not work out as I had in mind at the beginning it was still frustrating. After I had built my machine and when I was testing it there were so many small problems that I had to fix. For example, my marble kept getting stuck in my time warp box and I had to take it apart to fix it so my machine could run smoothly.
My greatest strength during this project was not giving up, there were many times when I did not understand something or it was not working in my favor, but I never gave in and ended up succeeding in the end. One time when I was designing my rube I lost all of the work that I had done and had to start over! But I was able to do so and in the end, and I came up with a better design plan. Overall, I created a product that I was proud of.
The Light Project
The project that we just completed in Physics was all about light. We studied many things including waves, refraction, color, and light waves. And we completed many activities such as building a pinhole camera and taking many photographs related to light. During this project, I grew as a scientist and learned many new and interesting things about light and how it works.
Project Reflection
My greatest strength during this project was the photographs that we took and being able to relate my photos back to what we were studying in Physics. For example, my final photo, which is focusing on reflection and was taken near Silverton and it was a photo that I am very proud of. My dad is a photographer so it was easy to ask him for help to get the best photo possible. I feel that the final photo that I took for this project is very thought out and clearly relates to reflection.
On the other hand, my greatest challenge during this project was understanding some of the background information on that we were learning. When we were studying the diagram of light reflection I did not understand most of the information we were receiving. To solve that problem I watched videos and read articles on my own time so I could understand the topic. If I ever don’t understand anything moving forward in this class, I will continue to try and figure out my question on my own, but if I am not able to answer the question myself, I will ask for help from a teacher.
My number one takeaway from this project is understanding the basic parts of Physics! Math and Science are not a strong point of mine but throughout this project, I was able to mostly understand what we were learning, and if I didn’t understand I was able to figure out my questions on my own. This learning is shown in my work when I was writing the document shown above. I explain how reflection happens and I even made a diagram to explain my work in more detail. I am proud that I was able to, preserve through not understanding a topic and complete work that I am proud of.
I think I grew as a scientist during this project when we were working on the pinhole cameras. It was fun and engaging when I made the pinhole camera photo, I felt like a real scientist. Usually, in past schools, science was just looking at a textbook but I feel that since I came to Animas we have done many engaging activities including the ones we did in this project. I feel that all of these activities have helped me grow as a scientist.
I feel that overall I did a good job on this project. I learned a lot about light and showed my knowledge with various activities. My final exhibition prep document is just one example of the work I did during this project that I am proud of. I was able to choose a great photo that is related to reflection and I had an explanation that was in-depth and I think clearly explained the photo I took and how it was related to our project. As well as the final exhibition prep document I completed many other assignments and for each one I made sure I was doing my best work, therefore I feel that I completed this project successfully.
